Search This Blog

25 November 2010

Marking gauge posse

I started wood working with a Stanley combo square and a pencil.  Not long into my journey, I decided to upgrade to a marking gauge.  Enter the made in India HF $7 mortise gauge.

I was at the top of the world.  All the marking gauge I would ever need.  I could mark cut lines and mortise lines, didn't cost much, life was great.  Then I got it home and brought it to a piece of wood.  Across grain the pins ripped the wood fibers, with the grain they grab and follow it, not exactly in a straight line.  So what now? 

Next trip to Wood Craft I drop $19 on a wheel marking gauge.  I also bought a marking knife on that trip.  It was better.  It sliced clean and did a good job.  But I don't care for it.  The blade bevel angle is too big, so it leaves a wide cut.  The locking knob needs pliers to get it tight enough to not move, and the fence doesn't work well for me either.  I had way too much of a tendency to rock it and not keep it straight against the reference face.  Then I read some magazine article somewhere (sorry I can't remember) that brings me to this beauty.

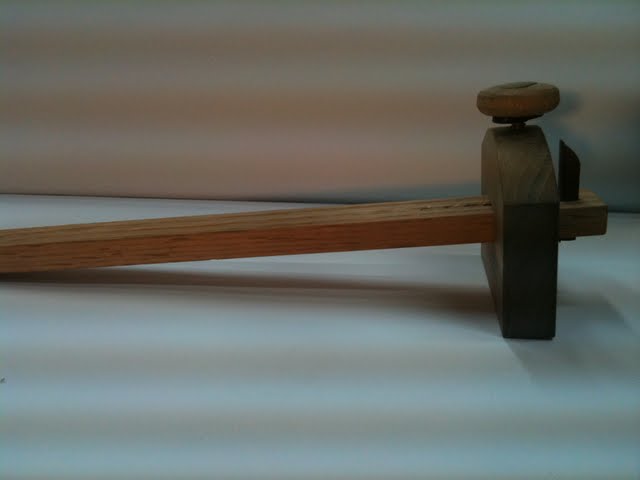
The straight blade, made from a jigsaw blade, cut like a dream.  The bearing surface of the fence was huge and easy to control.  Setting the gauge however was a bit of a pain.  The bolt dug into the wood when set tight enough to hold, and the mortise for the bar was a little too sloppy so the fence had a tendency to wiggle.  It didn't help that it was only about 5/8" thick.  Lastly, the wedge that holds the blade is installed so that the force down on the gauge to engage the cut pushes up on the wedge.  Does this seem wrong to anyone else?  I don't mean to say it was a huge design flaw, it held most of the time.  but occasionally it would slip.  By far my favorite at this point, but still had its issues. 

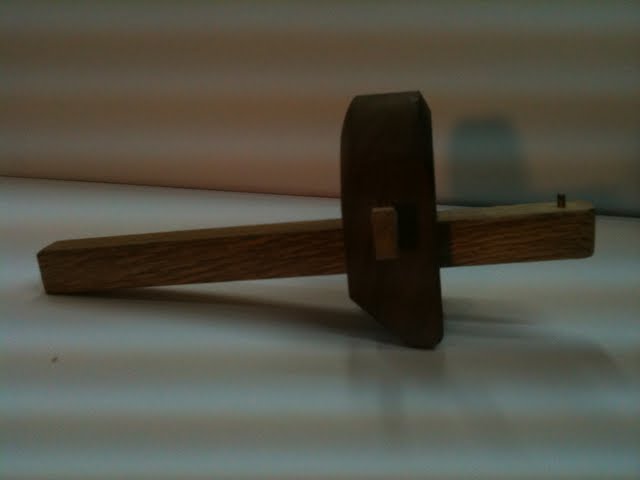
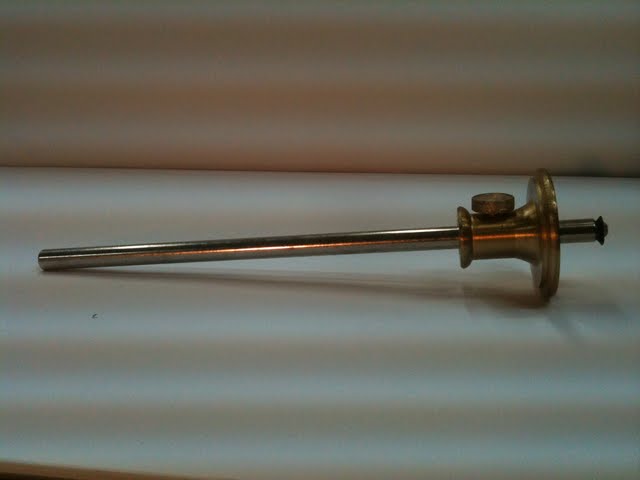
Then I read an article in Popular Woodworking by Dean Jansa, that covers the hot little French number pictured above.  With nothing to loose but a little scrap and some length off my 5/64" drill bit, I put her together.  Purely amazing.  Clean slicing with and across the grain, no grain following to speak of.  Lock it down solid with a quick push of the thumb and/ or rap on the bench top.  No wiggle, no tipping, no fuss, no frills.  Simple and easy.  I have used it for about a year or so.  It is my go to gauge.  So much so that I actually avoid using any of the other 3.  My wheel gauge lives in the bottom drawer of my tool box, (only because anywhere else seems to chip the blade) and the other 2 live on the bottom shelf of my bench.  This fine piece of craftsmanship however lives on the bench most of the time.  It was bad enough that I found myself laying out one side of a mortise and tennon and then the opposite face. Then one shoulder line then the other.  I would re-gauge a line because I didn't leave my sweet heart setup like I should have because I wanted to use her on something else.  So, with my new found desire toward learning to use hand tools better, I decided I needed to add a couple more French beauties to the crew.  

So with the plans to make a couple marking gauges starting this past weekend, what should appear at the Logan Cabinet Shoppe blog?  Why a podcast on this very subject, of course.  The wood working gods were smiling upon me.  In the video, which I highly recommend to everyone, (Bob is in the latest Popular Woodworking issue by the way), Bob shows a quick bit about how he uses a dowel, instead of a wedge, to "mass produce" the gauges.  Que the light bulb. 

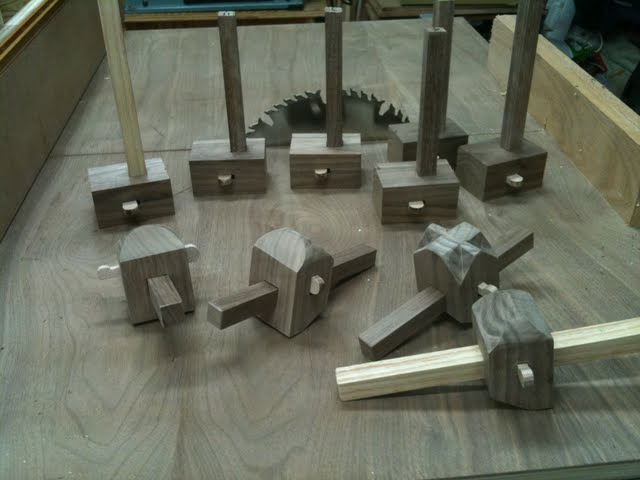
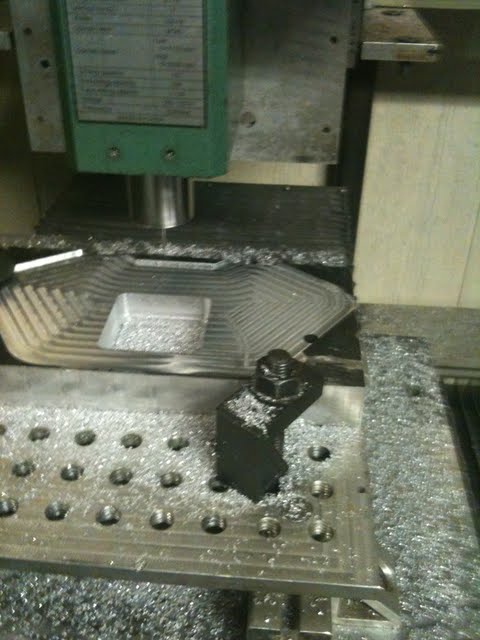
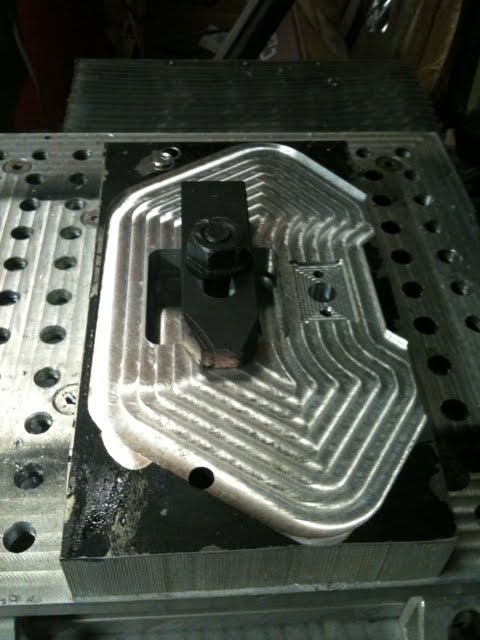
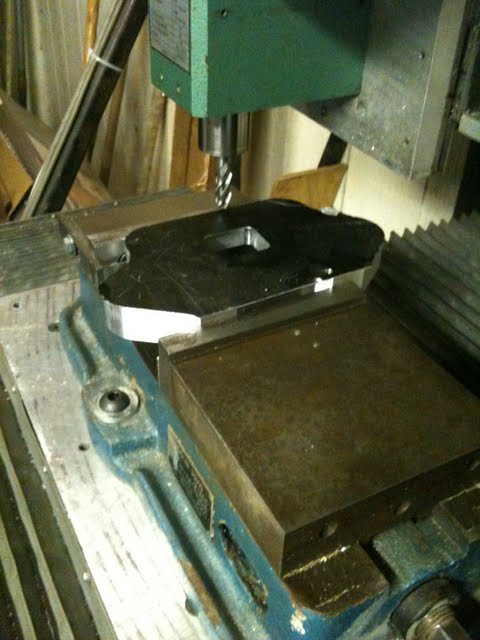
Since I'm not a hand tool only shop, I opted to use the mortise attachment on the drill press, and start banging these babies out.  I planned for 11 (I may have a slight addiction) but got 10 good blanks.  I decided to stick with the original wedge design instead of Bob's ingenious dowel trick, just because I like the feel of the wedge I have.  So, how do you make multiple wedges?  Took me a few times to figure it out, but I ended up making one big wedge and cutting 1/4" slices off of it. 


So as of 1 minute into Thanksgiving, I have 4 complete except for the cutter, and 6 more to shape.  If you cant tell by the picture, I am playing around with the shapes of the top.  This is the fun part. I figure it may help distinguish one from the other in the future as well.  I may also plane down the thickness a little after I use them a while.  I left the stock beefy at about 1/2" thicker than my original. Only time will tell.  And just so you don't think I have a serious problem, I know another wood worker who might get a couple of these if he wants them, only a couple though.

As always feel free to put any questions or comments in the section below, or look me up on Twitter or Facebook.

Until next time....


18 November 2010

Router Plane Part The Last

So when we left off with a problem.  A big problem.  Our iron wouldn't cut.  Shannon Rogers from The Renaissance Woodworker left a comment on my last post pretty much confirming what I already assumed.  The bottom of the iron should be at a slight angle to the body to ensure that the edge contacts the material to be cut before the heel.  My step-dad did some clean up work on the irons using a grinding wheel mounted in the mill and the iron mounted at a slight angle.  This seems to have resolved the problem.  We decided to add a little decoration since we had the time and the means.  This is the fastest I have ever written my name in metal.  It may well also be the only time I have written my name in metal.


And finally, here is the finished product

In the next two videos, I must apologize for the shoddy camera work and the annoying background noise.  Something is up with my camera, and I really need to get to the bottom of it.  If it bothers you feel free to mute the sound as I'm not the best on camera personality anyhow so you wont miss out on much.

This video is a quick overview of the whole assembly process. 


And here she is in action.


As always if you have any questions or comments feel free to use the section below or contact me on Twitter or Facebook.

Until next time....

P.S. This post is dedicated to my step-dad, Les, for all the hard work he put in on this plane.  I owe him. 

16 November 2010

Router Plane Part 3

Last time we left off with the plane body and tool holder joined together.  Next it was time to make the adjuster.  What would a new plane be without a little bit of solid brass?  Much like on the wood lathe I started with a piece of square stock since my step-dad didn't have any round. How much does a piece of brass cost?  Mom cooked the family and I dinner so I made money on the deal. After turning a cylinder I needed to knurl the end for the "grip".  Odd shapes? Another thing the CNC excels at.

The adjuster and the tool both need grooves to mate together.  This gets done in the lathe.  Just as a side note, if you ever decide to do some turning on an allen wrench, their pretty hard; like laughed at a tool steel cutter hard.  Like made a solid carbide tool wince a little.  However brass cuts like butter.  I love working with brass almost as much as wood.  I went with #10-32 bolts for the control so that one turn of the knob moves the iron 1/32". 


Next the body was set in the vise at 30* to mill for the handle locations.  I chose 30* because it looked right.  It felt right.  A couple of holes drilled and tapped for 1/4"-20 bolts to attach the handles and we almost have a working model.

I made a second blade out of another allen wrench, and milled it down to 1/4" wide.  The handles where turned on my wood lathe on a mandrel.  Currently they are poplar and two different shapes so I can feel out what I like the best.  When I have a design I like I plan to turn them out of laminated walnut blanks.  Why not Rosewood or some other fancy exotic?  Because I don't have anything exotic laying around the shop other than pen blanks.  Remember the point of this exercise is to put as little money into this thing as possible.  I'm sure I will have plenty of time in it, especially after I pay my step-dad back for all the time he has put in it, to not justify buying some beautiful turning blanks for the handles. 

So, why no pictures of the finished product?  Why no video of the plane in action?  I have encountered a small problem.  Mainly to do with the irons.  I think that possibly the metal lathe ways are not perfectly square to the head stock, or my technique on the work sharp is not perfect.  Most likely the second of the two.  The issue I ran into is that the blade does not stay engaged in the wood.  As the plane moves forward the cutter ramps out and rides above the surface.  The back of the iron is not perfectly parallel to the sole of the plane.  What to do now?  Ah, but I have a plan.

Stay tuned.  Next time we cover the fix for the problem (I sorely hope as I haven't had time to make it back to my step-dad's shop to try my fix), the final details of the plane, and a nice long video of this bad boy in action (again I hope, see above hope for reference).

As always feel free to comment below or contact me on Twitter (via the badge on the right) or Facebook(via the badge at the bottom of this page).

Until next time....

Router Plane Part 2

And now... Page two

So we left off with a plane body cut to final shape, surfaced on two sides, and with a "landing spot" for a tool holder.  The next logical progression would of course be to make the tool holder.  This tool holder is designed to hold a 3/8" allen wrench.  If this arrangement doesn't work out, or I decided it doesn't hold and edge long enough, I can always make a new tool holder.  Maybe one to hold the Veritas replacement irons.  So to hold a hexagonal blade, you need a hexagonal hole.  By using the smallest end mill available we were able to keep corner clean out to a minimum and just take a few swipes with a triangle file. 


Now it's time to turn that 3/8 allen into a blade.  Chuck it up in a metal lathe and turn the short end flat. It will take some work on the grinder and work sharp to get it to a usable condition, but it's a small price to pay for a blade that cost me $4.86.  Plus I get another set of allens that are only missing the 3/8". 


Now we marry the two part together and we get something that resembles a tool.  I took the assembly home, stuck some 600 grit wet/ dry to the table saw and lapped the sole about 2 minutes.  Nice and smooth. 


That's all for this post folks.  Tune in next time and we will make adjusters, mill the body for handles, and more.

As always, feel free to comment below or look me up on Twitter or Facebook.

Until next time....

15 November 2010

Router Plane

Let's say you really wanted a router plane.  You have wanted one for a while.  You really have your eye on the LN router plane but could never justify the 145 smackers to purchase it.  Then you found out about Shannon Rogers Hand Tool School and really wanted to join.  Looking at the recommended tool list for the first semester, you see router plane on the list.  This makes you want that router plane even more.  It will bring you that much closer to completing the recommended tool list and deciding to pull the trigger on the Hand Tool School.  Guess what, you still don't have the 145 bucks to order one.  What are you going to do? 

Now, let's say you're me. Then I can tell you exactly what you're going to do.  You're going to go over to your mom and step-dad's house and use your step-dad's talent and machinery to make one.  "How does one go about this?" you might ask.  Let's run through the high lights.


The process starts much like a wood project.  The raw materials, in this case a hunk of billet alluminum about 6"x 10"x 1 1/4" thick.  Where does one get said material?  From your step-dad's shop, of course.  Cost: dinner. 


Then you take said block and surface one side of it.  This is of course done best with the home made CNC mill.


Next it needs a hole so you can see the iron through the tool.  If you've been following along then you recognize the CNC mill and let me tell you it sure does make quick work of square holes.


Now you need some way of holding the iron in the plane.  How 'bout a precision machined "landing spot" for the iron holding device?


Now that the "joinery" is done, you can see we have a lot of waste left.  Changing the clamping position alows the waste to be cut away and the body to take it's final shape.


Now we get to surface the other side. Thought y'all might like a little video of the CNC in action.

So, what now?  Well for that you have to wait for the next installment.  You didn't think I was going to give it all away in one sitting did ya? 

As always feel free to comment below or look me up on Twitter or Facebook.

Until next time....


Shop Tour

I decided to go ahead with the shop tour that I talked about in the first post.  I'll start by saying I make no apologies for my camera work or the lack of cleanliness in the shop.  I didn't stop to clean up, setup a special camera, lighting, or anything.  This is my shop, in the raw. I do what I can with what I have and enjoy every minute of it.  I will make apologies for the interesting music.  It is Flip Video stock music.  It was called "A Perfect Saturday" and I couldn't pass that up for a shop tour video. So since a picture says a thousand words, I'll let the video do the talking and save myself the typing. 


If you want to know more about anything you see, feel free to comment below.  You can also find me on Twitter and Facebook.

Until next time.....

14 November 2010

Why Come?

My favorite two year old in the world (AKA my daughter, AKA doitchka) used the phrase "why come" the other day.  Not why, not how come, but why come.  This post is the why come of this blog. 

So here's the question: "Why come the Red Dirt Wood Shop blog?"  Answer:  I don't know.  Maybe because everyone else has one.  Maybe because I read so many blogs, watch so many videos, and listen to so many podcast, that I thought it was time to offer what little knowledge I have to the world of Internet wood working as a thank you for all of the education I have gained.  Maybe to document my progress into this wonderful hobby we call wood working.  Maybe it's all of these things and more.

So, let's cover the bases. 

First, a little bit about myself.  I'm 29.  I will have been married to the same wonderful woman (who lets me park her van in the drive when I'm home) for almost 9 years.  She has blessed me with three wonderful children, whom I adore.  Sasha (names changed to protect the innocents) is my seven year old boy.  Doitchka as mentioned above is my two year old daughter.  Lastly is my 6 month old daughter, #3.  I work as a service technician for a company that manufactures bakery packaging equipment.  What you need to know about this is that I travel for a living.  I go all over the world installing and repairing equipment in bakeries.  I'm away from home 180-220 nights a year.  However, when I am home I don't have a day job to speak of.  I field the occasional call, and wait for the next email to tell me to leave.  I may be home 30 hours, I may be home 30 days, one never knows.  When I'm away, I am obviously not in the shop, and have to get my sawdust fix through all my great companions on the net.  When I am home, I spend all the time in the shop I can, bar all the wonderful family time I get to spend with the wife and kids. 

Now, let's talk about the shop.  I share a 26'^2, two car garage with a mini-van, lawn care equipment, and various other sundries.  When I'm home the van stays in the drive for the most part.  Power tool wise I have
  1. Lathe- Central Machinery 36" ways 6" swing picked up at a garage sale for $100
  2. Table saw- Hitachi C10FL 10" left tilt 24" rip capacity.  Bought at the blue big box.
  3. Planer- Dewalt 12 1/2" lunch box 3 knife single speed.  Also bought at the blue big box.
  4. Jointer- Delta 6" bench top.  Picked up at an auction for $35
  5. Band saw- Craftsman 10" 82 5/8" blade direct drive.  Picked up at an auction for $10 w/ the stand
  6. Drill press- Ryobi 12" variable speed bought at the Borg.
  7. Sander- Craftsman 2" belt 6" disk, a present from my MIL
  8. Router table- Woodpeckers Bought at WC
  9. Router- PC 2 base kit variable speed Bought at WC
  10. Plate joiner- PC bought at the Borg
  11. Various other drills, circ saws, jig saws, grinders, dremels, etc
I guess a shop tour post is in need.  Maybe that will be soon. 

But why the Red Dirt Wood Shop?  The Red Dirt part is easy.  I live in prime red dirt territory, south east Oklahoma.  And the Wood Shop?  That's not so easy.  Why not studio or cabinet shop or (the list goes on and on)?  Mainly because I am a hobbyist, not a real "Shoppe", and like the wood shop at your local high school, it's my place to learn and explore. 

Next up is my wood working history.  I started wood working about three years ago.  Before that I never really had the time or space or means for a hobby.  I had dabbled in model cars over the years and when time, space and means became available I started collecting proper model car supplies.  Glues, paints, hobby knifes, little tubes of bondo and small squares of special sand paper etc.  After doing my first air brushing on a piece of card board and seeing the cloud of over spray go all over the garage, I decided I needed a paint booth.  A 2'x2' box with furnace filters and computer cooling fans.  Simple.  Lucky for me I have a father who ,apart from being my best friend (not many guys can say that), is also a hobbyist wood worker.  He got into the hobby from remodeling his house.  So one Saturday my family and I went to visit, Dad said "Let's go build it."  Some scraps of 1/2" ply and a couple hours later, I realized I'd had more fun building that simple box than I ever had putting together a model car.  The rest is, as they say, history.

Lastly, what should you expect to get from this blog?  Nothing.  I figure if you keep your expectations low, you are never disappointed.  Honestly though, I don't really know what you should expect.  Will I post on a regular basis?  I doubt it.  Will my post be brimming full of good info or humor or a good story.  I will try.

Always feel free to leave comments.  I am always open to constructive criticism and blatant praise. (hey everyone likes their ego stroked every now and then)  You can also find me on Twitter and Facebook.

Until next time.....