Search This Blog

Showing posts with label home made tools. Show all posts

10 July 2011

eBay Issues

I have a minor problem with eBay. Having just slid down into its grasp, I'm not certain I can fight my way out. I went in search of mortise chisels, since I have yet to locate any around here. I have a 4 set of Marples that I sharpen at 30* for chopping, and a 6 set of Two Cherries that I sharpen at 25* for light chopping and paring. I have an unknown 2" wide 9" long chisel I sharpen at 20* for paring cuts only. I didn't have any pig stickers. Enter eBay purchase number one, the 1/4" English style handle mortise chisel.

I unwrapped her and gave her a quick sharpen, and a light bulb went on, it was the easiest mortise I had ever cut.  Now I just need to find a 3/8" and a 1/2".
While I was on eBay, I decided to have a look at moving fillister and plow planes.  Low and behold, what did I find but this beauty. Here she is straight out of the box.  

A little TLC, a sharpening session, and some polish work on the brass, and she looks and works like this.
I added a strike button to the top for the mallet, but I need to redo it.  The previous owner, as is normal for the time, had his name stamped once on the toe, once on the top, and twice on the heel, but when I took the fence off for cleaning and such, I got another surprise.  There, in pencil, was his name and a date.
Mr. Isaac McPherson owned my new baby in 1867, 144 years ago.  Looking up the maker of the iron confirms this story.  I love to see a tool that is so old, still be fit as a fiddle, and ready for another 150 years of service.

Just so you don't think I forgot about the plow plane, I have a bid in on a Stanley #45.

I also completed the last lesson before the final for The Hand Tool School this week.  And here she is in all her knotty Alder glory.


As always, feel free to post any questions or comments in the section below. You could always contact me on Facebook or Twitter via the links on this page. 

Until next time...

30 June 2011

3 Marking Knives for $1.09

About 10 years ago, I joined the United States Navy. I was engaged to be married at the time. While in training in San Diego, CA, I flew home at Christmas time and tied the knot with my wonderful wife and flew back to San Diego. Two months later, I had rented an apartment and my bride flew out to meet me. Our entire household goods were contained in the two suitcases she brought with her. Needless to say, we had to purcase a lot. Being a military income meant we had to buy it cheap. One of the many things we picked up was a set of four "steak knives" at the everything's a dollar type store. These were our knives for about a year until we bought a nicer set and they got pushed to the back of the drawer.

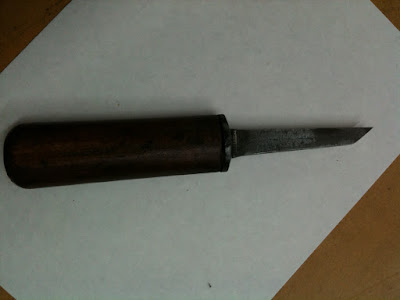
Nine years and five houses later, there is only one left. My wife gave it to me as a "shop knife" so that it was out of her kitchen. About six months ago, I found it kicking around out in the shop and decided I didn't need a shop knife, but I did need a spear point marking knife. I had purchased a right handed marking knife from a store a few months prior, and I have to say I wasn't completly pleased with it. It didn't hold an edge very well, and the whole handed thing was a pain in the neck. After using my shop made one for about six months, it is the marking knife I always reach for, even for opening packages, cutting string, etc.

I decided to spend a whole $1.09 to buy another pack of knives to demonstrate the process to y'all. What follows is a slide show of that process. It is pretty simple. Just make sure to quench your steel to keep it from over heating. As you can see in the last shot, my original still has its plastic handle, but it doesn't take much to make a handle. All told, for the three I made today, it took a total of three hours fifteen minutes. Enjoy.


As always, feel free to post any questions or comments in the section below. You could always contact me on Facebook or Twitter via the links on this page.

Until next time....

18 November 2010

Router Plane Part The Last

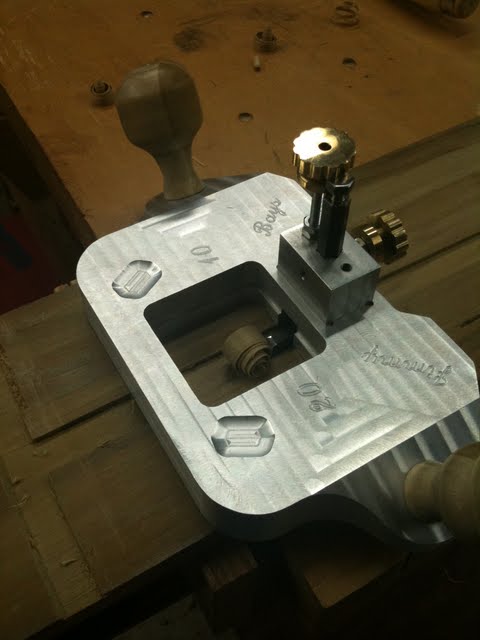
So when we left off with a problem.  A big problem.  Our iron wouldn't cut.  Shannon Rogers from The Renaissance Woodworker left a comment on my last post pretty much confirming what I already assumed.  The bottom of the iron should be at a slight angle to the body to ensure that the edge contacts the material to be cut before the heel.  My step-dad did some clean up work on the irons using a grinding wheel mounted in the mill and the iron mounted at a slight angle.  This seems to have resolved the problem.  We decided to add a little decoration since we had the time and the means.  This is the fastest I have ever written my name in metal.  It may well also be the only time I have written my name in metal.


And finally, here is the finished product

In the next two videos, I must apologize for the shoddy camera work and the annoying background noise.  Something is up with my camera, and I really need to get to the bottom of it.  If it bothers you feel free to mute the sound as I'm not the best on camera personality anyhow so you wont miss out on much.

This video is a quick overview of the whole assembly process. 


And here she is in action.


As always if you have any questions or comments feel free to use the section below or contact me on Twitter or Facebook.

Until next time....

P.S. This post is dedicated to my step-dad, Les, for all the hard work he put in on this plane.  I owe him. 

16 November 2010

Router Plane Part 3

Last time we left off with the plane body and tool holder joined together.  Next it was time to make the adjuster.  What would a new plane be without a little bit of solid brass?  Much like on the wood lathe I started with a piece of square stock since my step-dad didn't have any round. How much does a piece of brass cost?  Mom cooked the family and I dinner so I made money on the deal. After turning a cylinder I needed to knurl the end for the "grip".  Odd shapes? Another thing the CNC excels at.

The adjuster and the tool both need grooves to mate together.  This gets done in the lathe.  Just as a side note, if you ever decide to do some turning on an allen wrench, their pretty hard; like laughed at a tool steel cutter hard.  Like made a solid carbide tool wince a little.  However brass cuts like butter.  I love working with brass almost as much as wood.  I went with #10-32 bolts for the control so that one turn of the knob moves the iron 1/32". 


Next the body was set in the vise at 30* to mill for the handle locations.  I chose 30* because it looked right.  It felt right.  A couple of holes drilled and tapped for 1/4"-20 bolts to attach the handles and we almost have a working model.

I made a second blade out of another allen wrench, and milled it down to 1/4" wide.  The handles where turned on my wood lathe on a mandrel.  Currently they are poplar and two different shapes so I can feel out what I like the best.  When I have a design I like I plan to turn them out of laminated walnut blanks.  Why not Rosewood or some other fancy exotic?  Because I don't have anything exotic laying around the shop other than pen blanks.  Remember the point of this exercise is to put as little money into this thing as possible.  I'm sure I will have plenty of time in it, especially after I pay my step-dad back for all the time he has put in it, to not justify buying some beautiful turning blanks for the handles. 

So, why no pictures of the finished product?  Why no video of the plane in action?  I have encountered a small problem.  Mainly to do with the irons.  I think that possibly the metal lathe ways are not perfectly square to the head stock, or my technique on the work sharp is not perfect.  Most likely the second of the two.  The issue I ran into is that the blade does not stay engaged in the wood.  As the plane moves forward the cutter ramps out and rides above the surface.  The back of the iron is not perfectly parallel to the sole of the plane.  What to do now?  Ah, but I have a plan.

Stay tuned.  Next time we cover the fix for the problem (I sorely hope as I haven't had time to make it back to my step-dad's shop to try my fix), the final details of the plane, and a nice long video of this bad boy in action (again I hope, see above hope for reference).

As always feel free to comment below or contact me on Twitter (via the badge on the right) or Facebook(via the badge at the bottom of this page).

Until next time....

Router Plane Part 2

And now... Page two

So we left off with a plane body cut to final shape, surfaced on two sides, and with a "landing spot" for a tool holder.  The next logical progression would of course be to make the tool holder.  This tool holder is designed to hold a 3/8" allen wrench.  If this arrangement doesn't work out, or I decided it doesn't hold and edge long enough, I can always make a new tool holder.  Maybe one to hold the Veritas replacement irons.  So to hold a hexagonal blade, you need a hexagonal hole.  By using the smallest end mill available we were able to keep corner clean out to a minimum and just take a few swipes with a triangle file. 


Now it's time to turn that 3/8 allen into a blade.  Chuck it up in a metal lathe and turn the short end flat. It will take some work on the grinder and work sharp to get it to a usable condition, but it's a small price to pay for a blade that cost me $4.86.  Plus I get another set of allens that are only missing the 3/8". 


Now we marry the two part together and we get something that resembles a tool.  I took the assembly home, stuck some 600 grit wet/ dry to the table saw and lapped the sole about 2 minutes.  Nice and smooth. 


That's all for this post folks.  Tune in next time and we will make adjusters, mill the body for handles, and more.

As always, feel free to comment below or look me up on Twitter or Facebook.

Until next time....

15 November 2010

Router Plane

Let's say you really wanted a router plane.  You have wanted one for a while.  You really have your eye on the LN router plane but could never justify the 145 smackers to purchase it.  Then you found out about Shannon Rogers Hand Tool School and really wanted to join.  Looking at the recommended tool list for the first semester, you see router plane on the list.  This makes you want that router plane even more.  It will bring you that much closer to completing the recommended tool list and deciding to pull the trigger on the Hand Tool School.  Guess what, you still don't have the 145 bucks to order one.  What are you going to do? 

Now, let's say you're me. Then I can tell you exactly what you're going to do.  You're going to go over to your mom and step-dad's house and use your step-dad's talent and machinery to make one.  "How does one go about this?" you might ask.  Let's run through the high lights.


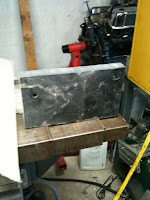
The process starts much like a wood project.  The raw materials, in this case a hunk of billet alluminum about 6"x 10"x 1 1/4" thick.  Where does one get said material?  From your step-dad's shop, of course.  Cost: dinner. 


Then you take said block and surface one side of it.  This is of course done best with the home made CNC mill.


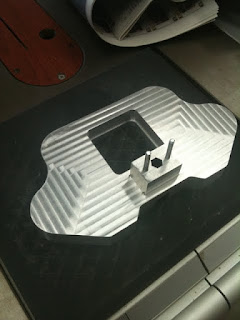
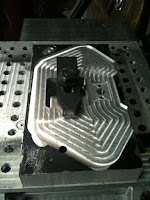
Next it needs a hole so you can see the iron through the tool.  If you've been following along then you recognize the CNC mill and let me tell you it sure does make quick work of square holes.


Now you need some way of holding the iron in the plane.  How 'bout a precision machined "landing spot" for the iron holding device?


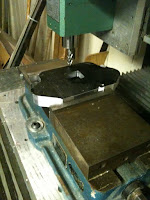
Now that the "joinery" is done, you can see we have a lot of waste left.  Changing the clamping position alows the waste to be cut away and the body to take it's final shape.


Now we get to surface the other side. Thought y'all might like a little video of the CNC in action.

So, what now?  Well for that you have to wait for the next installment.  You didn't think I was going to give it all away in one sitting did ya? 

As always feel free to comment below or look me up on Twitter or Facebook.

Until next time....